Hi all!
For my next project I have chosen the excellent new tooling Airfix P-51D in 1/72nd scale (A01004).


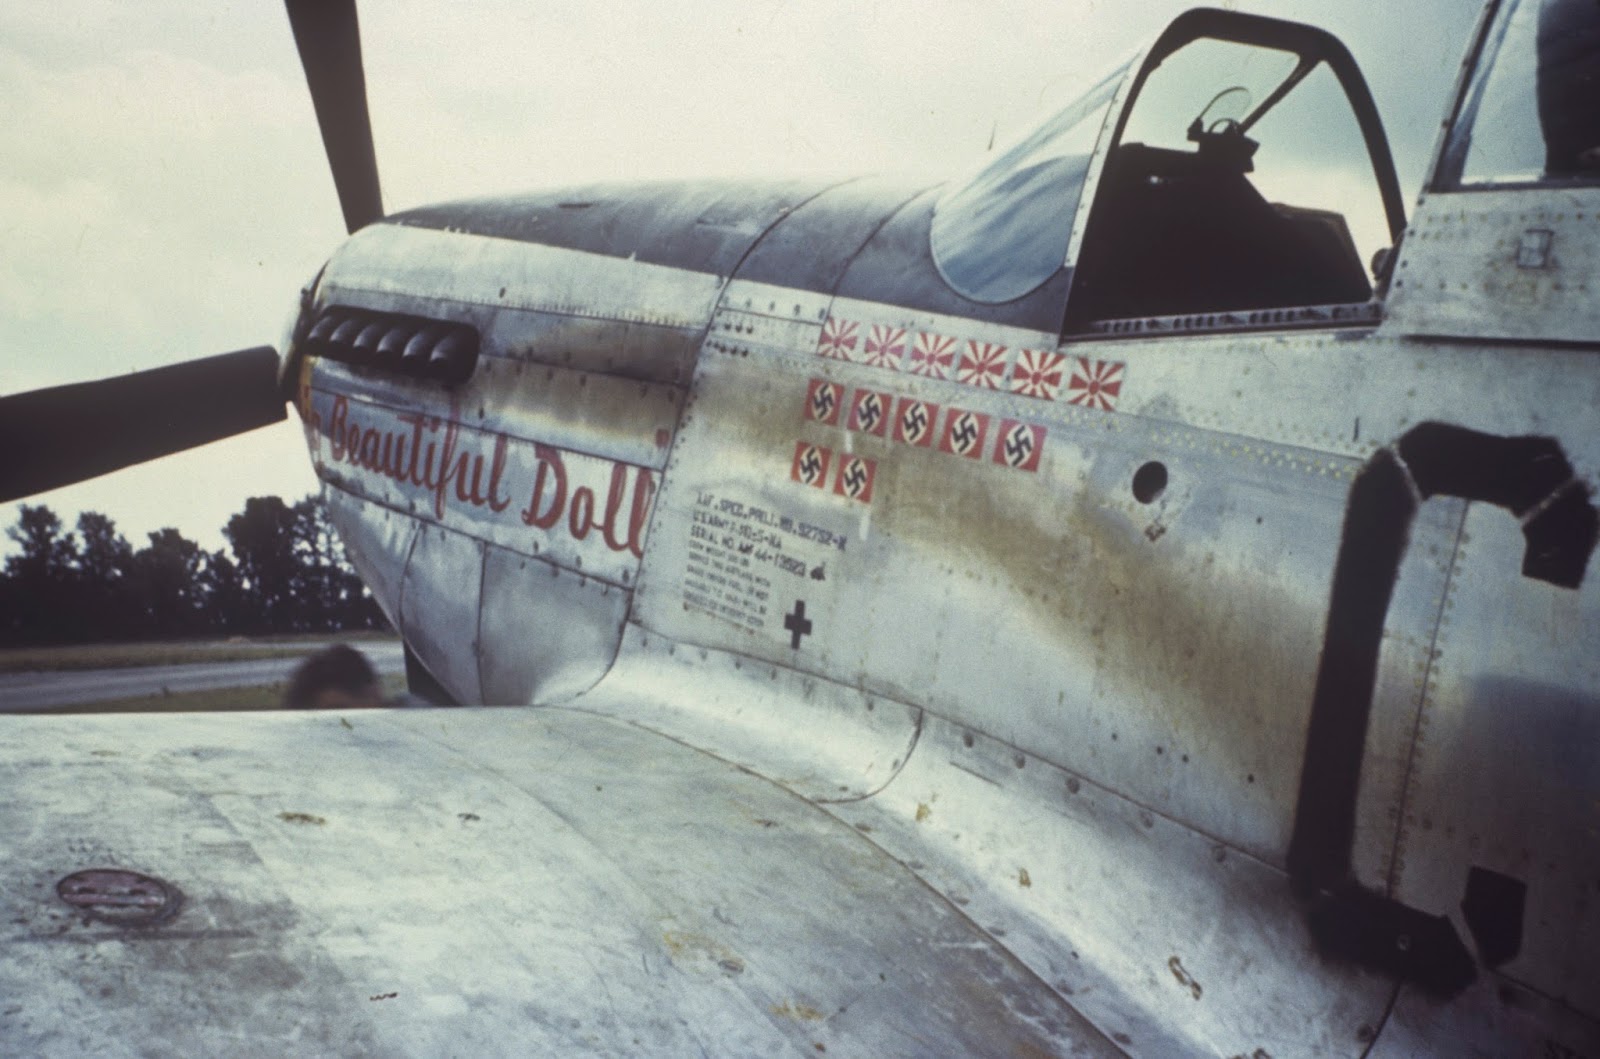
I'll try to make the personal airplane for Lt.Col. John D. Landers, the P-51D-20-NA, 44-72218, Big Beautiful Doll, , 78 FG, 84 FS which I consider as one of the most colorful Mustangs on WWII.
 | |||||||


The Mustang Wings...
One of the most important features of the Mustang was a wing designed using laminar flow airfoils which were developed co-operatively by North American Aviation and the National Advisory Committee for Aeronautics (NACA). These airfoils generated very low drag at high speeds. During the development of the NA-73X, a wind tunnel test of two wings, one using NACA 5-digit airfoils and the other using the new NAA/NACA 45–100 airfoils, was performed in the University of Washington Kirsten Wind Tunnel. The results of this test showed the superiority of the wing designed with the NAA/NACA 45–100 airfoils.
 |
| P-51D on the Inglewood assembly line |
In the photo above we can notice that all panel lines on the upper wings have been carefully filled, smoothed and primed before application of (on natural metal Mustangs) final coats of high speed silver lacquer. Even small flaws on the surface of P-51 wings could cut performance.
Another photo from the book P-51 Mustang in Action (Squadron - Aircraft No. 45) showing the Dallas production line, we can see that the main wing panels are painted in primer, prior to being sprayed silver. All P-51Ds were painted in this manner.

This is a characteristic mostly overlooked in Mustangs scale models and I decided to replicate it.
Firstly I searched for a schematic showing which panels should be filled, after looking on several modelling forums, I came across the below schematic:

The photo below also helps to confirm this schematic, note how smooth is the wing surface.

So I started filling the panel lines according to the schematic above.
 |
| The original kit part with all the panel lines |
 |
| Panel lines filled using melted sprue |
Here the final result after sanding it all flush.


I've built the interior. Airfix did a good job and it is well detailed. The panel is a decal but for this scale I think is more than enough.

I've done the interior of the landing gear covers, I've tried to replicate a panel shade difference that is very noticeable in Mustangs, so after painting it gloss silver and weathering it with Tamyia Panel Accent, I mask the panel and applied a flat clear coat. You can see the difference in shade on live, but not in the photo.

I've used an Eduard painted PE set for USAF WWII. It rally adds a lot to the cockpit.
The radio still needs to get wired. The floor is the characteristic timber, in front of the stick control you can see the top of the wings and it is painted Yellow Chrome (Tamiya XF-4) the timber floor is Vallejo old timber.

I decided to paint the cooling exhaust area in aluminium since my references pointed this way.


 |
| Exhaust air intake. Note the aluminium colour and also the reinforcement bar in the middle. |
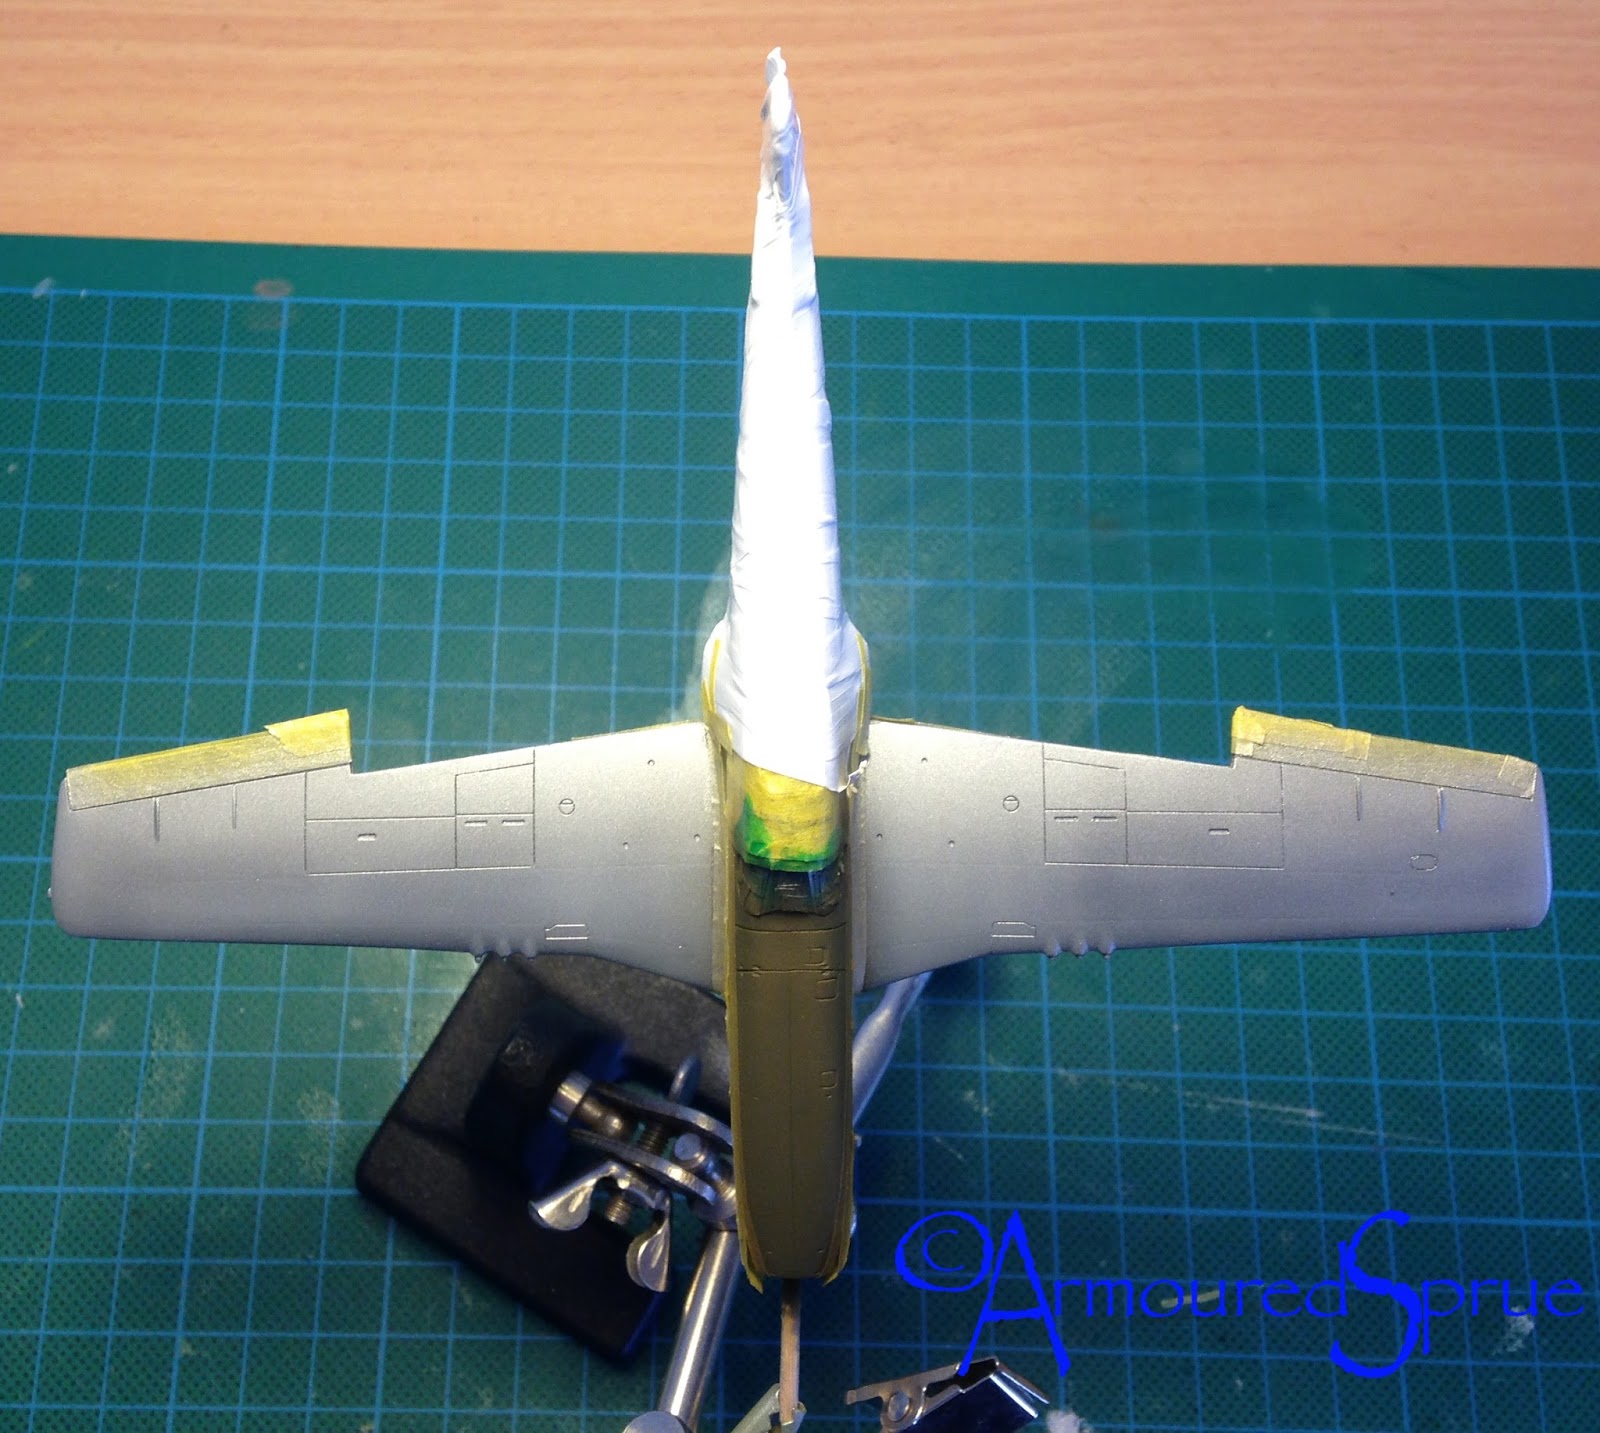
Time to put wings and fuselage together. No dramas here and they fit perfectly requiring almost no putty. I've sanded with wet sandpaper grit 600, 800, 1000 and 1200, and than re-done all lost panel lines.


I add some wiring to the radio set. Not much reference here, so I took some educated guess...


I also mask the canopy and windshield using Tamiya tape.
Painting time!
I started by airbrushing a nice, smooth and bright black paint using Tamiya X-1 with a few drops of Future.


Followed by Tamiya Titanium Silver X32.


I'm trying something a little different to achieve a more natural metal
finish. So my plan is to use Medium graphite finely ground. 


After rubbing the graphite I did apply a coat of Future to protect and prevent any finger print to ruin my model.
I also airbrushed the anti-glare olive drab, in this case I used 8:XF62+2:XF49 and also mask the areas to paint the wings with the Aluminium Lacquer

The original formula for the aluminium lacquer was a mix of lacquer (or resin) and aluminium powder, so I mixed 1:H8 Gunze Silver + 1:XF53 Tamiya Neutral Grey


When I started to place the decals I've noticed that the checkered wing tips decals didn't have the white so I needed to paint it. The mummy is do I've used Plumber Teflon tape to mask the model before airbrushing Tamiya XF-2 White with a few drops of Future.


All decals in place and a coat of Future applied overall.
These Eagle Cals decals are the best decals I've ever used very easy to use and react good to Micro Sol/Set.
Airfix provides a lot of stencils with their decal sheet and that's was the most tedious part, but it's worth the effort.

After a final coat of Future and letting it to dry for 2 days, I have started the weathering process.
If you have seen my previous models you've seen that I like then worn out and (ab)used, so that's what I got so far:


 |
| Starboard wing showing all grease and smudge especially on the gun panels |
So I decided to fix it. First I've painted the base with X32 Titanium Silver

Next I use marker pens to paint the lights (Red, Green and Amber)


And here is the final result.

Another improvement is the hydraulic line for the landing gear breaks. I've used sewing tread stiffened with PVA glue (white glue), and also glued in place with PVA glue.

An interesting detail is the flap indicator painted on the port side flap, it was used for pilot's quick reference.


Model complete, click here
2 comments:
This looks awesome. I'm building one for my Uncle's 60th he was in the RAAF and this is his all time favourite. I was hoping you could help me with the paint colour breakdown. I really don't want to mess this up. Appreciate the help.
Hi Chris
I'm happy to help.
What kind of information do you need?
Cheers
paulo
Post a Comment