This is the first time I'll build a Hobby Boss kit :)
I'll represent an aircraft from the Brazilian Air Force (FAB) of the 1st/14th Fighter Squadron, Pampa Squadron, based in Canoas Air Base located in Canoas, Rio Grande do Sul.
I'll try to make the FAB 4865 as it receive a commemorative painting scheme celebrating the 53rd Anniversary of the Squadron creation in 2000.
The aircraft:
This plane was ex-USAF 72-01400 and it was bought in 1989. In 2000 to celebrate the squadron 53rd Anniversary it received a commemorative painting. It was the first time ever in FAB history that it happened. The painting was done by Cap-Av. Sérgio Barros de Oliveira, and was to represent a Siberian Tiger. In the CL tank, there is the phrase: "53 Anos" (53 Years).
It was painted between the 18th and 19th of March 2000 with the assistance of Sgt. Jefferson Awes do Santos and Sgt. Carlos Kleber de Oliveira Câmara. The 4865 was officially presented on the 24th of March, during the Squadron anniversary ceremony.
The plane held this painting until the 23rd of April 2002 when it was due for its routine inspection at PAMA/SP. (Source: Já te atendo tchê! - A História do 1/14 GAV, O Esquadrão Pampa, José Leandro Poerschke Casella, Rudnei Dias da Cunha, Ed. Action 2005)


 |
| F-5E FAB 4865 in Canoas, RS Brazil circa 2000 |


 |
| The different paint schemes for the 1/14 Gav. |
The kit
A little bit of an introduction just to show what do you get for your buck.
 |
| Box art |
 |
| Instructions |


 |
| Decal sheet |
 |
| Colour plate for painting |

 |
| Clear parts |
 |
| Sprue 1 |
 |
| Sprue 2 |
Although this kit comes with decals for a Brazilian version(FAB 4839, based in Santa Cruz Air Base, RJ) it needs some surgery to correctly represents that aircraft, especially the dorsal fin extension, since it was a plane from the 1st batch received in 1974. See photo below of the FAB 4836 which was from the same batch.
 |
| FAB 4836 before and after the upgrade. Note the dorsal fin extension. |
That's why I have decided for the FAB 4865.
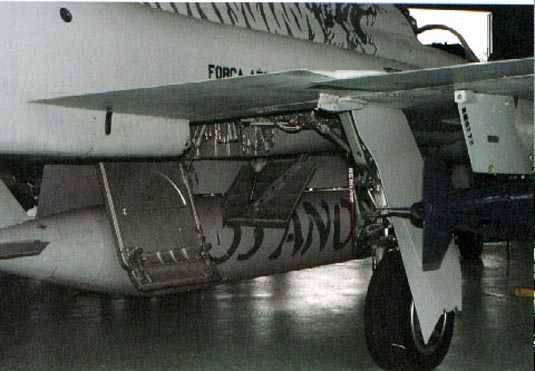
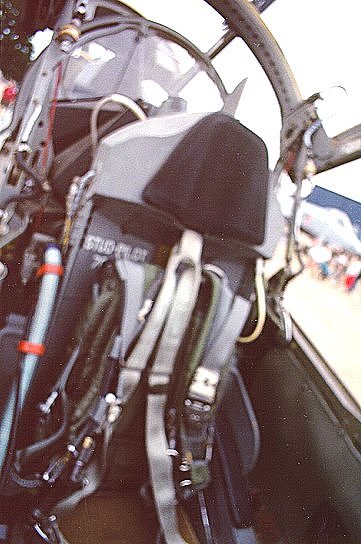 |
| Here is an example of the ejection seat used in the Brazilian F-5E. |


And here we go again!
Joined the fuselage halves, after installing the cockpit in place together with some weight to keep the nose to the ground. I had a few issues aligning the parts and some dry fit was required, even though I had to use some putty to smooth things down.
The wings were another story, I had to do a lot ( I mean LOTS) of dry fitting before gluing it in place and after that also some putty was required to the wing root x fuselage joint.


I also sanded off the light beams under the cockpit and polished it to restore shine after completed.

I did some details to the external of the jet tubes.


Here is one of my references, Detail & Scale Vol.5 - F-5E & F Tiger II, note the position of the nose landing gear.


The result was this:

Another item I did improve was the wheel tires. I added the tire treads using the same technique as for scribing the exhaust tubes.

I also replaced the pitot tube by scratch bulding a new one with seringe neddles and using the kit supplied one as a template.

Some work was done on the landing gear, gear bay and doors. Painted using Gunze Acrylic Chrome. Weathered wusing Tamiya Panle accent (mix of Brown and Black).
 |
| Sorry abou the this bad photo |


Started to work on the AIM-9B, applied XF-2 Flat White thinned with Future, now it is time for decalling and detailing painting.

The arrest hook painted also using Tamiya paint. I scribbed a panel line in the hinge line.

Finally I was able to glue the canopy and windshield in place using white glue (PVA glue). I also did the masking using Tamiya tape and Mr. Masking Sol R.


A little research was required to determine what kind of armament to be included in the model. The various photos I've seen it varies the type of missiles used. For example, the first photo below shows only one Python in the internal pod.

In this photo of an F-5 from different squadron but same era shows the Python (exercise in this case) plus the AIM-9 on the wing tip

In more recent and updated versions of the F-5 we can see the use of the Brazilian made Piranha which is the substitute for the AIM-9, plus the Python.
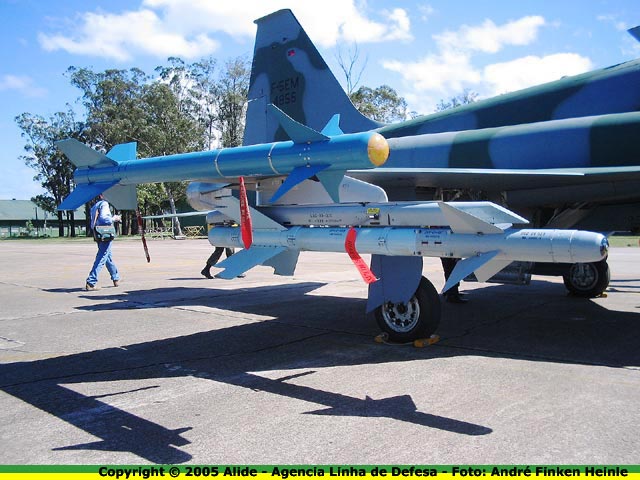
I therefore, decided to use the combination of AIM-9 plus Python as seen in the second photo above.
My friend Serelle gracefully sent me a resin Python.

The fun started with the black primer. Not really a primer since I have used Tamiya XF-01 Black straight from the jar.


The exhausts received a coat of Burnt Iron.

I then started to cover them in grey FS36463 which I have made mixing Tamiya acrilics 8:XF02 White + 1:XF69 Nato Black. The idea was to give a first coat randomly and then gradually build up the colour but allowing for tone variances.
The first victim was the external fuel tank.


Here are the landing gear doors and speed brake, showing the application of the first step - randomly applied grey

Here is the result after applying the final coats.

This process is very boring so I'm not rushing and doing small steps each time. Here is what I got so far.


Following, I covered it with several layers of very thinned paint. The idea was to allow some of tis effect to show through the paint and give the impression of weathered paint with some touch ups. Here are some photos:


In order to install the new Python missiles, the pylons had to be modified and the trail extended.
I did this modification using some spare parts from spare parts box.
 |
| Modified pylons |

Finally the model is done, please see below the photos.

 |
| Model getting ready for the photo shooting |


