SHORTS TUCANO T.1
O Tucano da RAF
(01/12/2011)
The box and the sprues!
Still deciding which painting to apply, divided between these two here:
The blue one is very appealing but the black and yellow is eye catching!
I'll start the building with the resin seats to replicate the MK8 ejection seats.
 |
| Assento Ejetor Martin-Baker MK8 (BR8LC) |
(05/12/2011)
First I just remove the seats from the resin block they were seating on, not an easy work and end snapping off the rocket guards on both seats, now I'll have to rebuild them. But I some progress painting the cockpit tube and adding some detail to right hand side fuselage, just behind the the cockpit, I also put some weight to keep the nose landing gear on the floor (I'll try to squeeze a few more once I glue the cockpit in place), see the pictures below.
 |
| Observe o detalhe que refiz na fuselagem. |
 |
| Cockpit pintado, assentos retirados do bloco de resina e teste para ver como se encaixarão, perfeitos! |
 |
Resumo do progresso do dia.
|
 |
| Também aproveitei para colocar algum peso no nariz, nesse caso chumbo no.9, ainda vou tentar enfiar mais alguns depois que colar o cockpit. |
(09/12/2011)
Busy day!
I finally finish painting the cockpit details and ending closing the the fuselage halves.
 |
| Vista do cockpit no lugar mas ainda sem os assentos ejetáveis. |
 |
| Close up do cockpit. |
 |
| Outra vista do cockpit. |
 |
| Assentos sendo pintados. |
 |
| Minha técnica para fazer as alças de ejeção: dois fios de costura (preto e amarelo) passa-se cola branca e enrrola-os e deixa esticado até secar, depois é só fazer o formato da argola, cortar e colar no kit. |
 |
| Aqui com os assentos ejetáveis no lugar. |
 |
| As duas metades fechadas e aguardando a cola (jet líquido) secar. |
(15/12/2011)
After a break due some commitments I am back into business. The following photos show the model after puttying and sanding, and to be honest I didn't use much putty at this stage, mostly sanding to remove the excess plastic melted when using JET liquid bonder. The nose was the part that has required more attention and I had to end using some cianocrilate to get a perfect joint.
I also fixed the exaust pipes after drilling a hole on them, this part required a bit more of attention and dry fit before gluing, I used Mr Surface 1000 to correct the joint cleaned with a cotton bud wetted in thinner 110 from Gunze.
 |
| Modelo após ser emassado e lixado. Não precisei de muita massa, apenas na área do nariz é que deu mais trabalho e foi onde usei Cianocrilato para obter uma junção perfeita. |
 |
Aproveitei para fixar os escapamentos, já que são complicados de se colarem e exigiu vários ajustes a seco antes da colagem. Depois de colado as juntas foram cobertas com Mr Surface 1000 e alisadas com um cotonete embebido em thinner 110 da própria marca. Aproveitei para fazer os furos do escapamento.
|
Next steps is to fit the wings.
(18/12/2011)
Hi all! I'm back with some updates.
I was very pleased and quite surprised by the excellent fit of the model. After a dry fit I just needed to put a little bit of Mr Surface 1000 on the joints and cleaned with a cotton bud wetter in Gunze 110 Thinner.
As you can see by the pictures it was enough the get a smooth joint.
 |
| Observe os encaixes no ventre, muito bons, apenas um pouco de Mr Surface 1000 e depois retirado o excesso com cotonete embebido em thinner Gunzer 110. |
 |
| Fiquei surpreso com os encaixes desse modelo. Apenas um teste a seco e correção com lixa antes de colar e depois Mr Surface ans juntas retirando o excesso com Gunze Thinner 110. |
 |
| Outra vista mostrando os encaixes muito bons para o modelo. |
Another thing that I decided to do was the landing lights located in both wings. To do this I followed the below sequence, first I cut the squares where the lights should be located and glued a piece of clear sprue on it using JET liquid bonder and set aside for completely dry overnight.
 |
| Decidi fazer os faróis de pouso localizados nas asas, para isso eu comecei cortando os locais onde os faróis serão posicionados e em seguida colei pedaços de sprue transparente usando JET líquido e deixei secar de um dia para outro. |
 |
| Veja como ficaram os sprues transparentes colados. Note tamb'em que aas junções da asas ainda não haviam sido corrigidas. |
I started giving the correct shape to the light using a file and sand paper (400 and 1000).
 |
| Começando a dar forma ao farol. |
 |
| Aqui já terminado. Primeiro lixei com lima até atingir o formato básico, em seguida lixei com lixa 400 e depois lixa 1000. |
After happy with the overall shape I gave it a polish using acrylic nail polish stick. I will give a coat of Future when I finish the painting.
 |
| Depois de lixado fiz um polimento com uma lixa para polir unhas acrílicas, posteriormente depois da pintura irei passar uma camada de Future. |
Well, I did represented the explosive cord on the cockpit canopy, I did it using white sewing thread glued using Future inside the canopy. As you can see in the photo below the design is a little bit complicated and I confess I could not represent it exactly, so I did the best approach I could and I thought it was enough in this scale.
 |
Fiz o cordão explosivo do canopy usando linha de costura branca colada internamente usando Future. Se você observar a foto acima verá que o desenho é bem complicado. Confesso que não consegui fazer o desenho correto mas fiz uma aproximação e julguei que ficou boa para essa escala.
|
The canopy already in place and glued! Yes! You will have to wait until I finish the model to see the explosive cord inside!
 |
| O canopy colado! Só depois de terminado vocês verão o cordão explosivo do canopy! |
(20/12/2011)
Hi all!
The update today is basically the navigation lights.
I wasn't happy with the modelled lights in the kit, so I decided to cut them using a photo etched saw that I have recently bought, then I glued a piece of clear sprue cut in half in place. Before gluing it I did a small hole with a drill bit in the end that would be glued and painted one in green (right hand side wing) and one in red (left hand side wing) as it is the international standard.
 |
| Eu não estava satisfeito com as luzes de navegação que no modelo vem apenas representadas como um baixo relevo. Assim eu decidi cortar o local onde elas estão localizadas, para isso usei uma micro-serra de photo-etched metal que comprei recentemente. Em seguida cortei um pedaço de sprue transparente ao meio, fiz um pequeno furo na parte que iria ser colada, pintei e colei no local usando JET líquido. |
 |
| O padrão internacional para luzes de navegação é cor verde no lado (asa) direito e vermelho no lado (asa) esquerdo. |
After allowing the glue to set overnight I started sanding it to shape, first using a file and following using sand paper 400, 600 and 1000. I always use the sandpaper wetted with water, which improves the sanding finish and also makes the sandpaper last longer. The final process was the same used to polish the landing lights described before witha final polish using the acrylics nail polish stick.
 |
| Depois de deixar a cola secar por um dia, comecei o processo de dar forma à luz. |
 |
| Promeiro usei uma micro lima para fazer o contorno geral. |
 |
| Em seguida comecei lixar usando lixa d'água. Eu sempre lixo com o papel molhado em água, isso melhora a qualidade final do acabamento e também faz com que a lixa se desgaste menos durante o processo. |
 |
| Comecei usando lixa d'água 400, em seguida 600 e finalmente lixa 1000. Para o acabamento final usei o mesmo processo descrito anteriormente para os faróis de pouso, com um polimento final usando lixa para polir unhas acrílicas. |
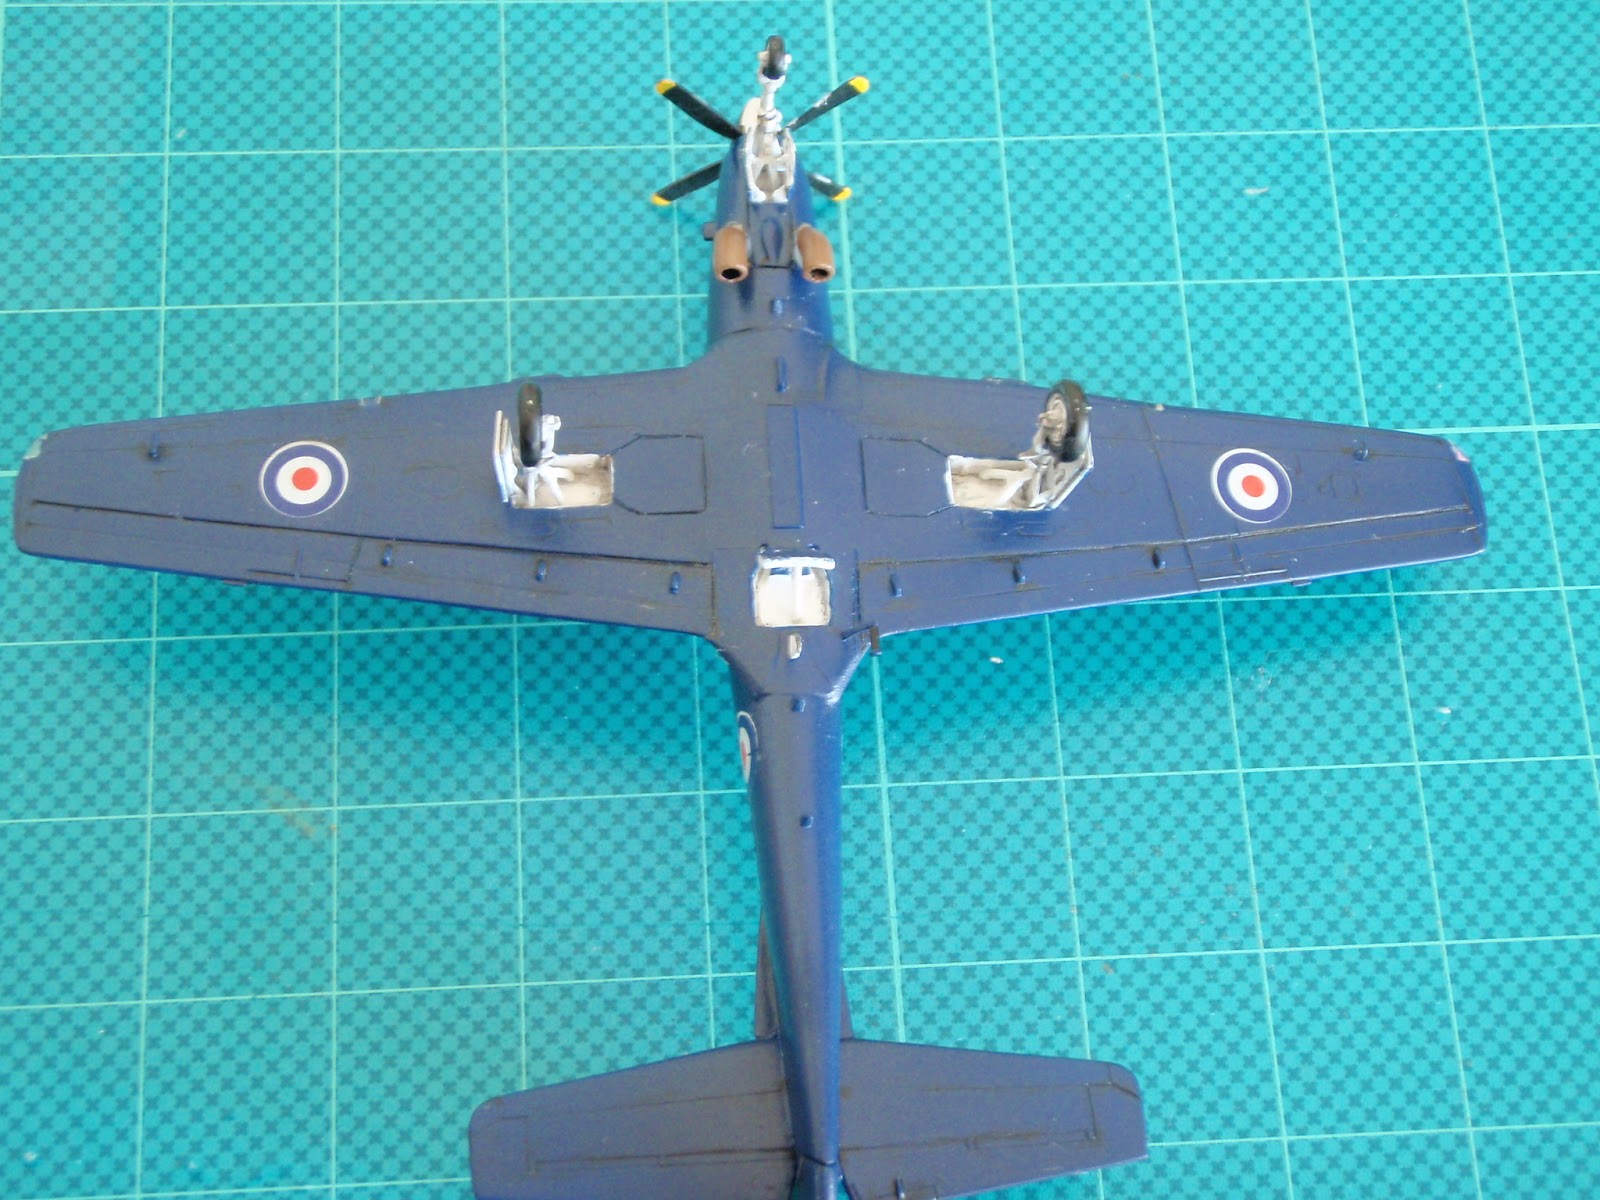
(10/02/2012)
Hi pals! After a long period without any update, here it is!
I already painted the model and gave it a coat of Future, I had a problem when applying the Future and I think it is because mine is a little bit old (I got it since 2004!!!!!), it formed a kind of granulation, like if it is when touching the model. I'll try to fix it by gently rubbing a tissue soaked in Windex and see what happens, than I'll re-coat the Future using a brush. I'm not into the idea of repainting this model (no way!).
Here are some photos:
 |
| Não é preto! É a iluminação que ficou ruim! |
 |
| Agora dá para ver o azul! |
 |
| Embaixo é que ficou uma falha acho que provocada pelo Future, ficou uma superfície enrrugada na raiz da asa, parecendo que o Future secou antes de chegar ao modelo. Vou passar um pano embebido em Vidrex cuidadosamente e depois reaplicar o Future no local usando pincel. |
Next time I'll show you the bits and pieces that I have painted.
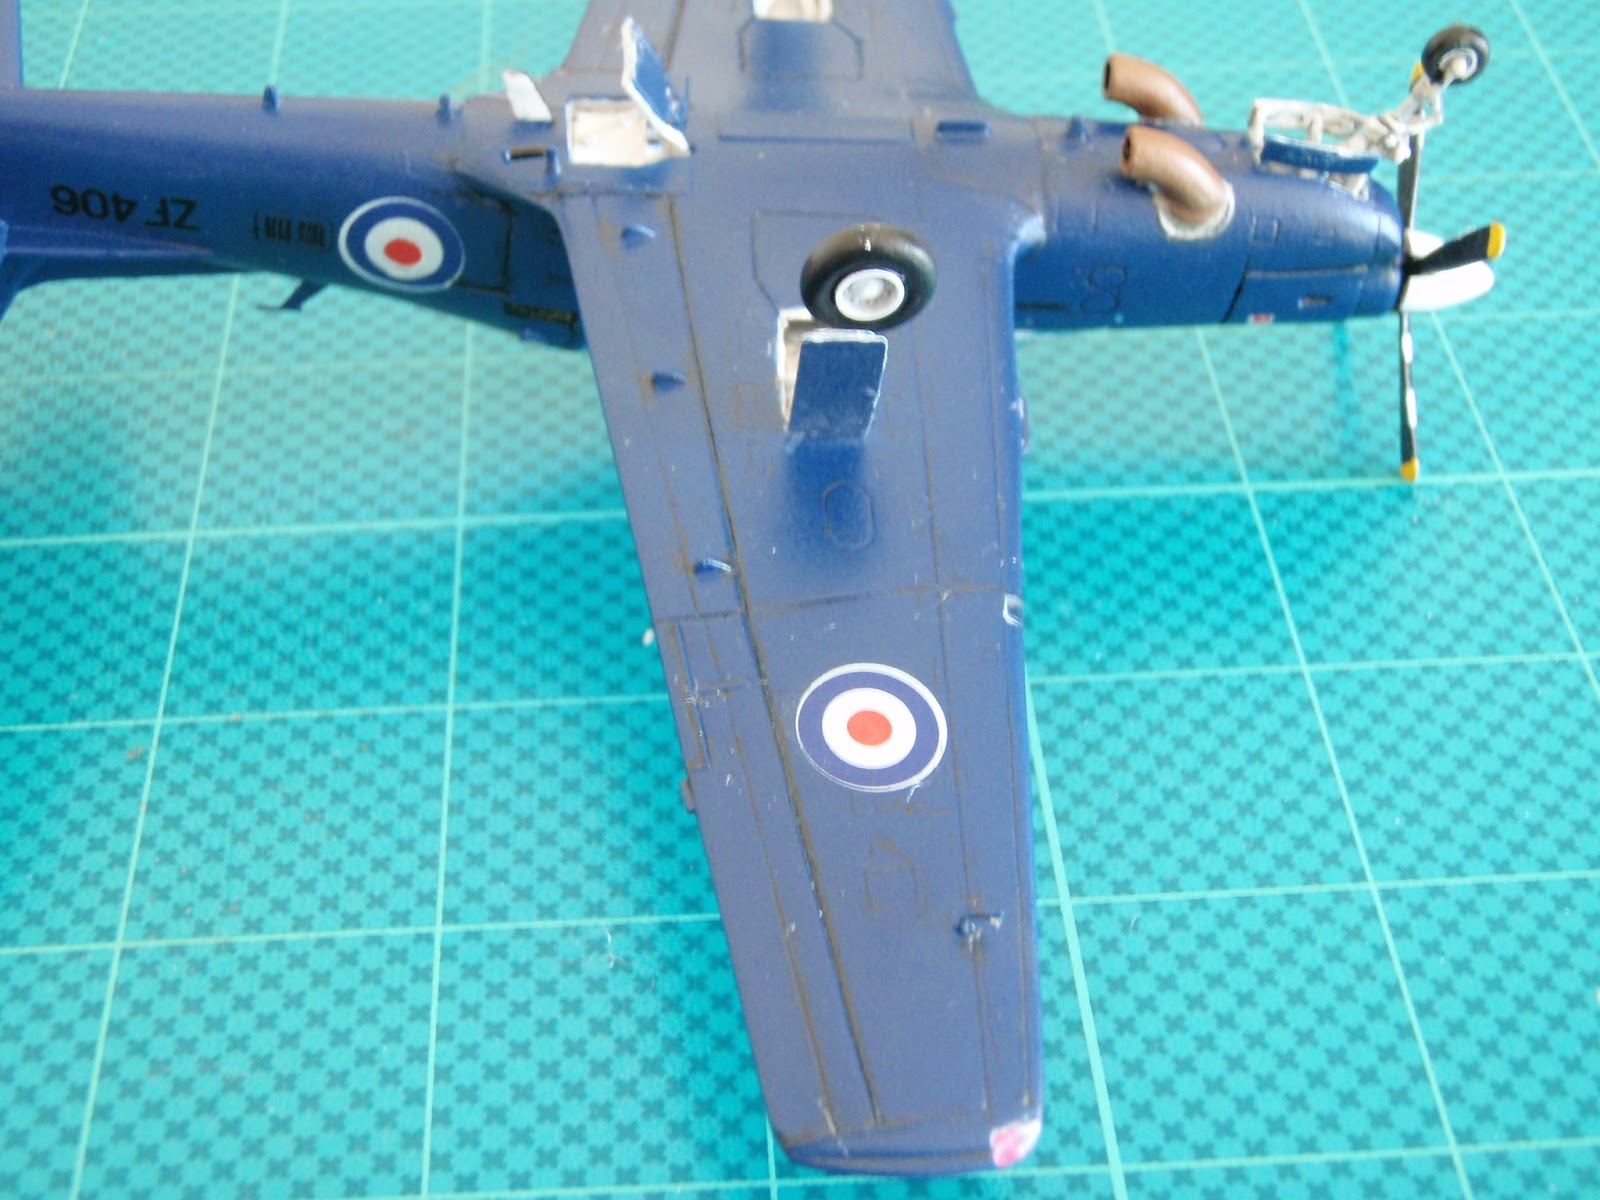
(12/02/12)
A model to forget!
This is how I'm feeling about this one!
This model proved to be an exercise of patient when finishing it.
I had problems with the painting and when I applied Future. I had problems with the decals (please lord deliver us from Airfix decals, amen!) Then when I got all the model ready, I decided to give a clear satin coat using Tamiya clear coats (a dab of matt + clear gloss), the first one went allright, than I decided to give a second one, well! I didn't work as planned! It formed a white crust on the top of the right side wing, I tried to remove using paper towel soaked in Tamiya thinner, it was a disaster! I ended up removing with a soak brush!
I gave another coat of clear gloss and that is it! (Before I try to make it really fly out of my window!)
Here is the result, please don't make any jokes! :D!